TorchDrug is a PyTorch-based machine learning toolbox designed for several purposes.
- Easy implementation of graph operations in a PyTorchic style with GPU support
- Being friendly to practitioners with minimal knowledge about drug discovery
- Rapid prototyping of machine learning research
Before we start, make sure you are familiar with PyTorch. Check out the official tutorial of PyTorch.
Tensor-based Graphs
Graphs
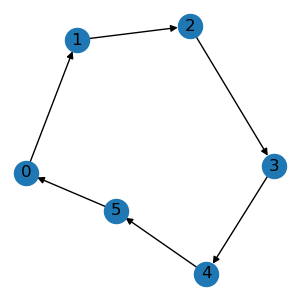
Graphs are the fundamental data structure used in TorchDrug. They can be viewed as a generalization of graph processing libraries (e.g., NetworkX) in a tensor framework, while enjoy GPU acceleration and auto differentiation.
import torchdrug as td
from torchdrug import data

edge_list = [[0, 1], [1, 2], [2, 3], [3, 4], [4, 5], [5, 0]]
graph = data.Graph(edge_list, num_node=6)
graph.visualize()
Molecules
A specfic instance of graphs in drug discovery is a molecule, which may have additional chemical constraints and features. For example, we can construct a molecule from SMILES string. SMILES is a language that describes complex molecule structures using a linear string.
mol = data.Molecule.from_smiles("C1=CC=CC=C1")
mol.visualize()
print(mol.node_feature.shape)
print(mol.edge_feature.shape)

torch.Size([6, 69])
torch.Size([12, 19])
Graph Operations
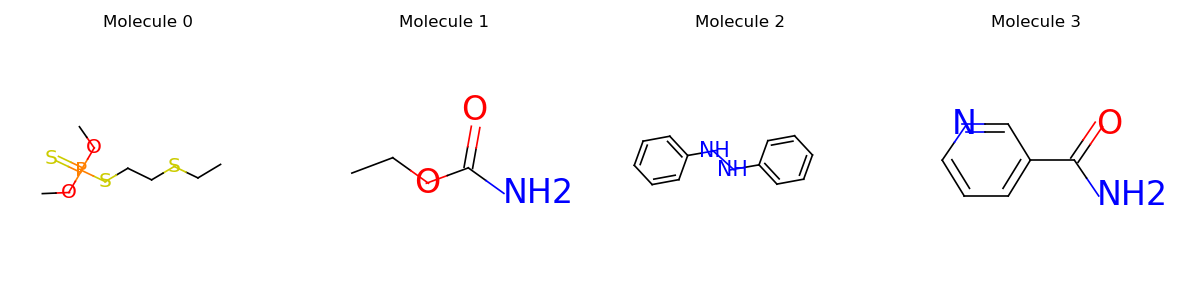
A group of arbitrary graphs can also be processed as a batch to maximize the utilization of hardware.
They can also be transferred between CPUs and GPUs using .cpu() and .cuda() methods.
mols = data.PackedMolecule.from_smiles(["CCSCCSP(=S)(OC)OC", "CCOC(=O)N", "N(Nc1ccccc1)c2ccccc2", "NC(=O)c1cccnc1"])
mols.visualize()
mols = mols.cuda()
print(mols)
PackedMolecule(batch_size=4, num_nodes=[12, 6, 14, 9], num_edges=[22, 10, 30, 18], device='cuda:0')
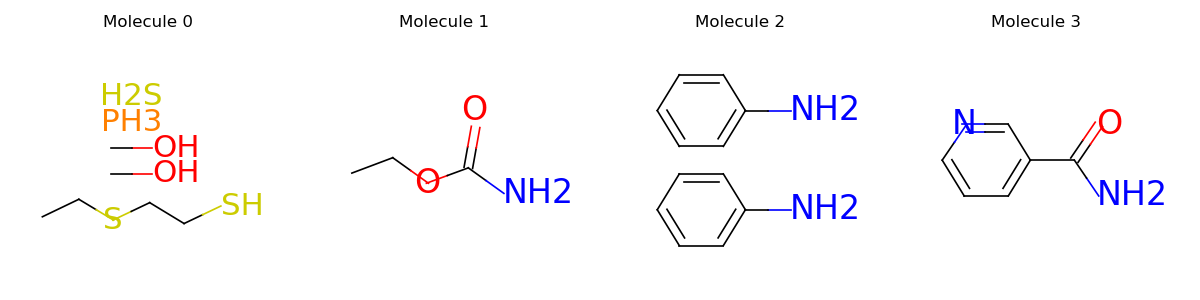
Just like original PyTorch tensors, graphs support a wide range of indexing operations. Typical usages include applying node masking, edge masking or graph masking. The following example shows how to select edges that contain at least one carbon. For more graph operations, please see the notes.
node_in, node_out, bond_type = mols.edge_list.t()
edge_mask = (mols.atom_type[node_in] == td.CARBON) | (mols.atom_type[node_out] == td.CARBON)
mols = mols.edge_mask(edge_mask)
mols.visualize()
A Molecule Classifier
Now we demonstrate how to create a molecule classifier with TorchDrug. Specifically, TorchDrug provides us with a large collection of popular datasets and models for drug discovery and graph representation learning. These help us avoid writing and debugging boilerplate code.
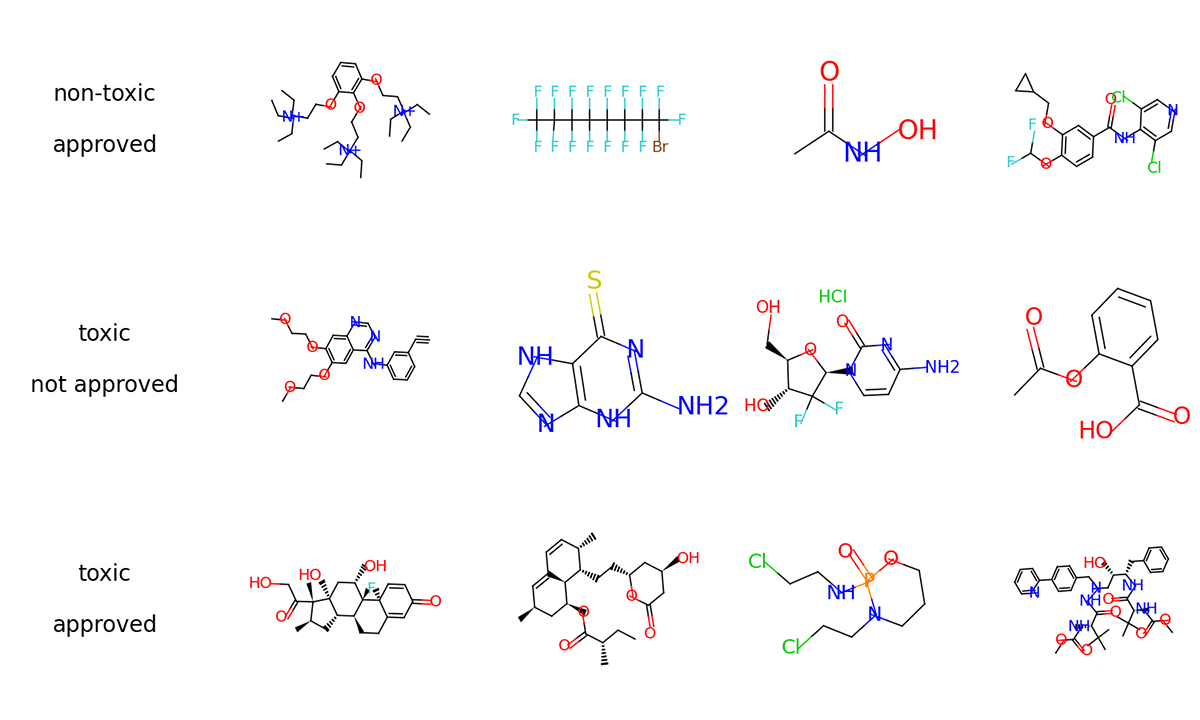
For this tutorial, we use the ClinTox dataset. This dataset requires to predict whether a molecule is toxic in clinical trials, and whether it is approved by FDA.
Load and Prepare Dataset Splits
First of all, we load the dataset with TorchDrug. TorchDrug will automatically download the dataset into the path you specify.
We then split the dataset into train, validation and test, with a ratio of 8:1:1.
import torch
from torchdrug import datasets

dataset = datasets.ClinTox("~/molecule-datasets/")
lengths = [int(0.8 * len(dataset)), int(0.1 * len(dataset))]
lengths += [len(dataset) - sum(lengths)]
train_set, valid_set, test_set = torch.utils.data.random_split(dataset, lengths)
Define a Graph Neural Network for Classification
We define a graph neural network to encode the molecule graphs. Specifically, we use the a Graph Isomorphism Network (GIN) with 4 hidden layers.
from torchdrug import core, models, tasks

model = models.GIN(input_dim=dataset.node_feature_dim, hidden_dims=[256, 256, 256, 256],
                   short_cut=True, batch_norm=True, concat_hidden=True)
Note the model is simply a neural network without any training target. To adapt it for classification, we wrap it with a property prediction module. We define the classification task by the binary cross entropy (BCE) criterion.
task = tasks.PropertyPrediction(model, task=dataset.tasks,
                                criterion="bce", metric=("auprc", "auroc"))
Train the Model
We create an optimizer for the parameters in the task, and combine everything into core.Engine. The engine
provides convenient routines for training and test.
optimizer = torch.optim.Adam(task.parameters(), lr=1e-3)
solver = core.Engine(task, train_set, valid_set, test_set, optimizer, batch_size=1024)
solver.train(num_epoch=100)
If we have any GPU, we can specify it in the engine to accelerate training.
solver = core.Engine(task, train_set, valid_set, test_set, optimizer, batch_size=1024, gpus=[0])
More acceleration can be achieved by multiple GPUs. In this case, we need to launch the script using
python -m torch.distributed.launch --nproc_per_node=4
solver = core.Engine(task, train_set, valid_set, test_set, optimizer, batch_size=256, gpus=[0, 1, 2, 3])
We may log the training and evaluation metrics to Weights & Biases platform for better experiment tracking in the browser.
solver = core.Engine(task, train_set, valid_set, test_set, optimizer, batch_size=1024, logger="wandb")
Test the Model
To test the model on validation set, it only takes one line.
solver.evaluate("valid")
Alternatively, we can make prediction on arbitrary input batches. The following code shows the prediction for the first 8 samples in the validation set.
batch = data.graph_collate(valid_set[:8])
pred = task.predict(batch)
Save and Load
Let’s save our trained model. We dump our model into two parts, where clintox_gin.json contains the
hyperparameters, and clintox_gin.pth contains the trained weights.
import json

with open("clintox_gin.json", "w") as fout:
    json.dump(solver.config_dict(), fout)
solver.save("clintox_gin.pth")
To load a pretrained model, we don’t bother to define the model again. Use core.Configurable.load_config_dict
and TorchDrug will automatically parse the model from the hyperparameters.
with open("clintox_gin.json", "r") as fin:
    solver = core.Configurable.load_config_dict(json.load(fin))
solver.load("clintox_gin.pth")
Hierarchical Interface
TorchDrug is designed to cater all kinds of development. It has a hierarchical interface, which ranges from low-level data structures and operations, mid-level layers and models, to high-level tasks. We can easily customize modules at any level with minimal efforts by utilizing building blocks from a lower level.

The correspondence between modules and hierarchical interface is
torchdrug.data: Graph data structures and graph operations. e.g. moleculestorchdrug.datasets: Datasets. e.g. QM9torchdrug.layers: Neural network layers and loss layers. e.g. message passing layertorchdrug.models: Representation learning models. e.g. message passing neural networktorchdrug.tasks: Task-specific routines. e.g. molecule property predictiontorchdrug.core: Engine for training and evaluation.
For more details about the interface, please refer to the document.